Case Study: Damp Wall Behind the Toilet in Bromley BR2, and the Flush Cone That Caused It
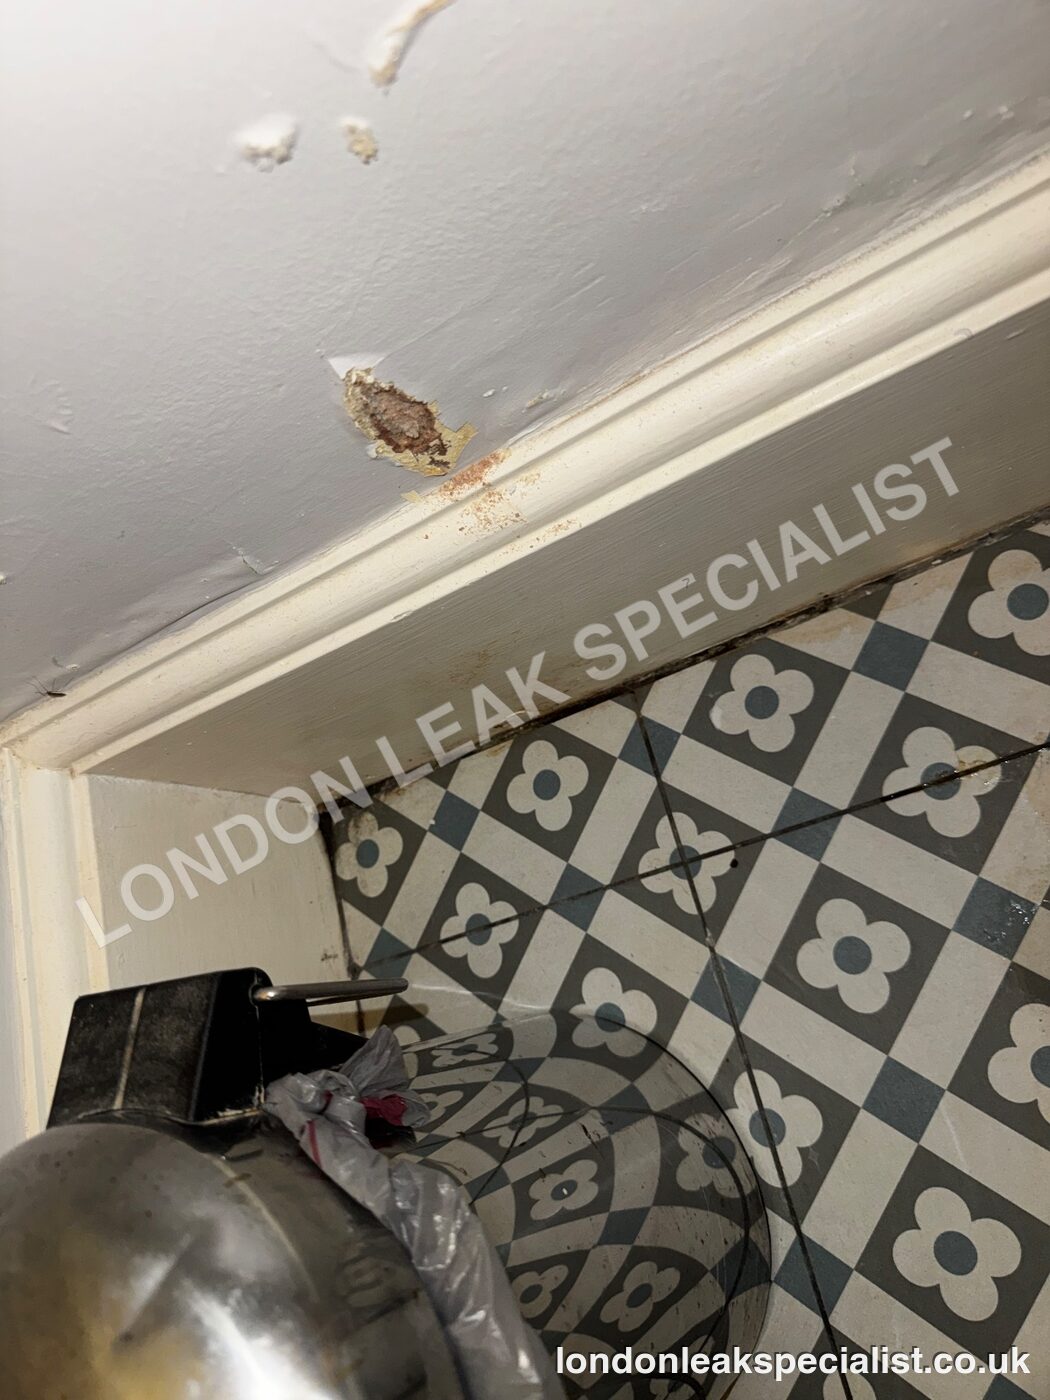
The damp mark on the wall beside the toilet, from a job in Bromley, BR2.
A surveyor had ruled out rising damp, and both water supplies held pressure. The damp patches behind a toilet in Bromley BR2 came from a worn flush pipe coupling and flush cone, a leak only a flushing test would show.
Damp patches on a wall are easy to blame on the wrong thing. In this job, a house in Bromley, BR2, in the London Borough of Bromley, the owner had already paid for one expert opinion, and it was a good one. It simply did not find the cause. What did was a short list of ordinary tests, run in the right order, and one of them was nothing more than flushing the toilet and watching.
We have removed the client, the address and every contact detail. What is left is the method, the photos and the report, which you can download as a redacted PDF.
The brief: damp behind the toilet, and a surveyor who had ruled out the obvious
Damp patches had appeared on the wall behind the toilet. The wall sits next to the boiler, the kitchen sink and the utility room, and it carries pipework serving several parts of the house. That is the difficulty with a wall like this: almost every pipe in the building is a suspect.
A surveyor had already looked. They advised that the damp did not look like rising damp or water coming through the external brickwork, and no salt deposits had been found in the affected area. That is useful, because salts are what rising damp normally leaves behind. But it only rules one cause out. It does not say what the cause is, and the owner was left with a wall that was still damp and no source. That is the point at which we were asked to attend, on 2 November.
What we ruled out first, and how
We began with a visual inspection of the wall and of the plumbing around it, and then moved to tests that give a yes or a no.
- Pressure test on the cold supply. We isolated the cold water and monitored a gauge for 20 minutes. No pressure drop.
- Pressure test on the hot supply. Same method, separately, for another 20 minutes. No pressure drop.
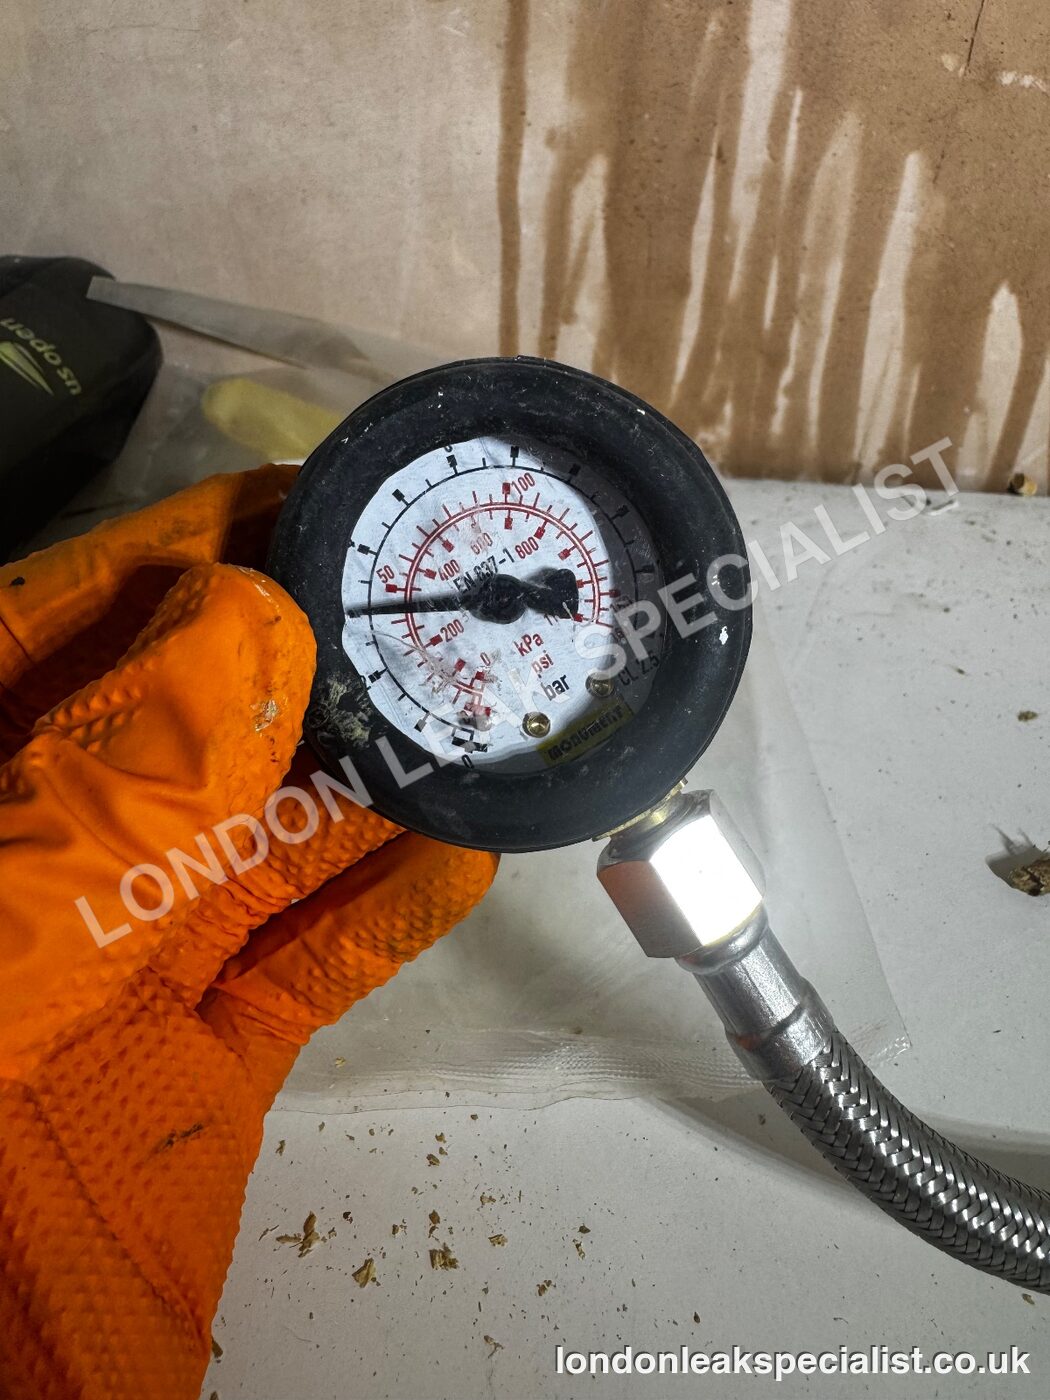
Testing hot and cold separately matters. A single combined test can hide a small leak on one circuit behind normal movement on the other, and if one side had fallen we would have known which pipe to chase. Here neither did. That meant the pressurised supply pipework in the wall was very unlikely to be the source, which is the result most people do not expect when the damp is on a wall full of pipes.
We also ran blue tracer dye into the wash basin and watched the waste pipework and its connections for any coloured water escaping.
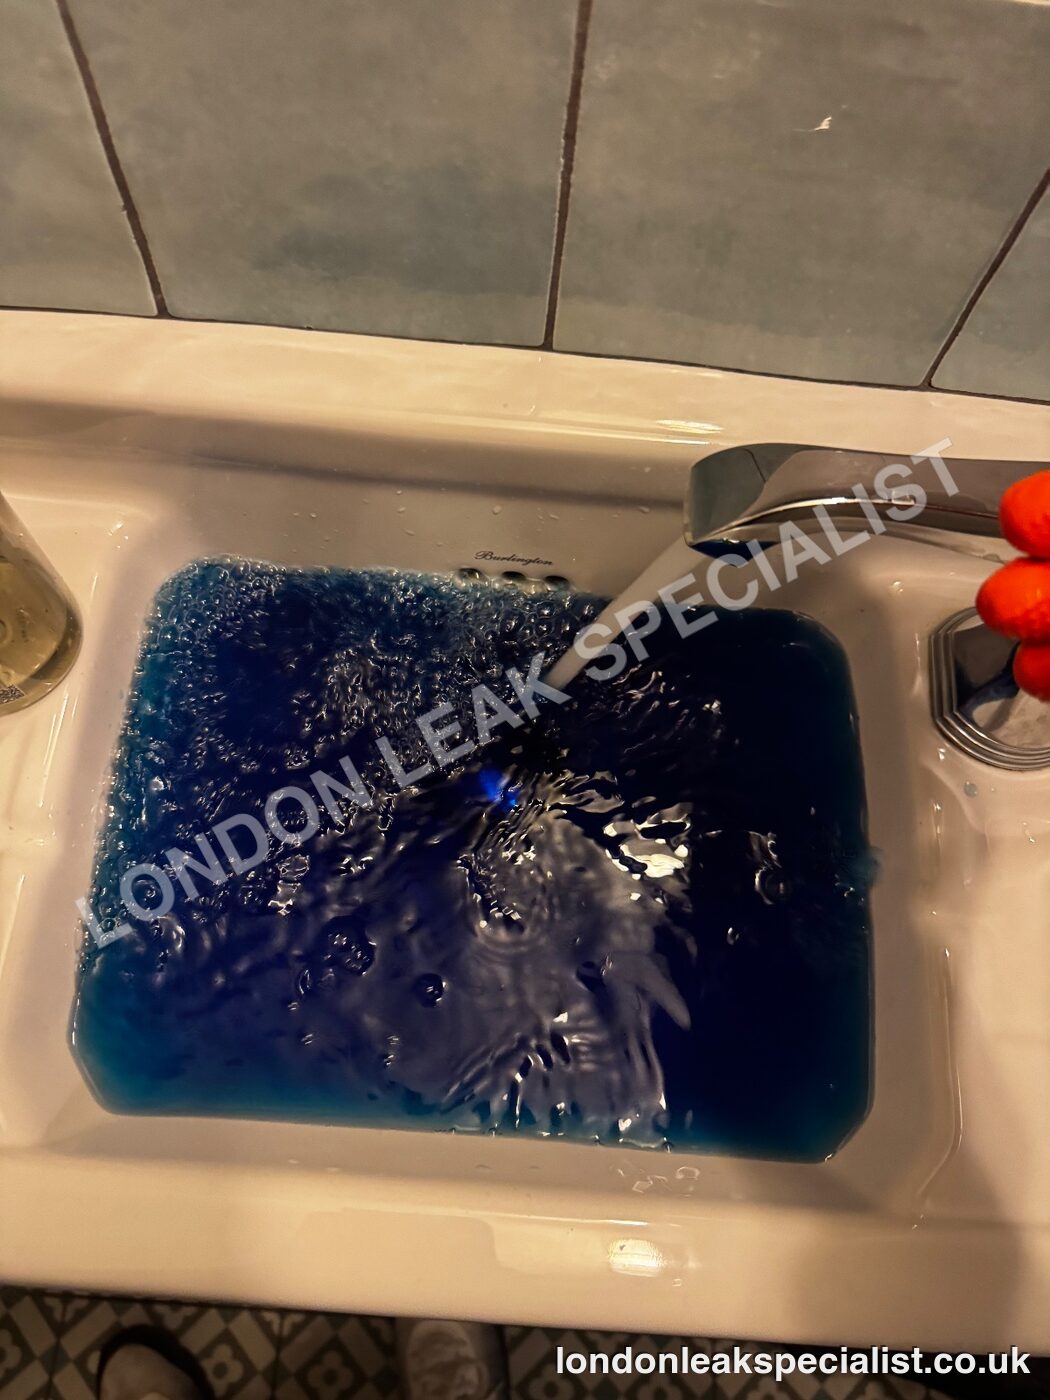
Nothing appeared. After these tests the report could already say that the pressurised hot and cold supply and the basin waste were not leaking at the time. That is real progress, even though it still looks like nothing has been found. It is also the stage where a lot of jobs go wrong, because the temptation is to start opening the wall to look at the pipes. We had no evidence that any of them was leaking.
The method: test the thing that only leaks when it is used
A pressure test tells you about pipes that are full of water and under pressure all the time. A toilet flush pipe is not like that. It is empty until you flush, then it carries a surge of water down to the pan for a few seconds. A joint on that pipe can be perfectly dry for hours and then drip every time the toilet is used. No pressure test will ever show it.
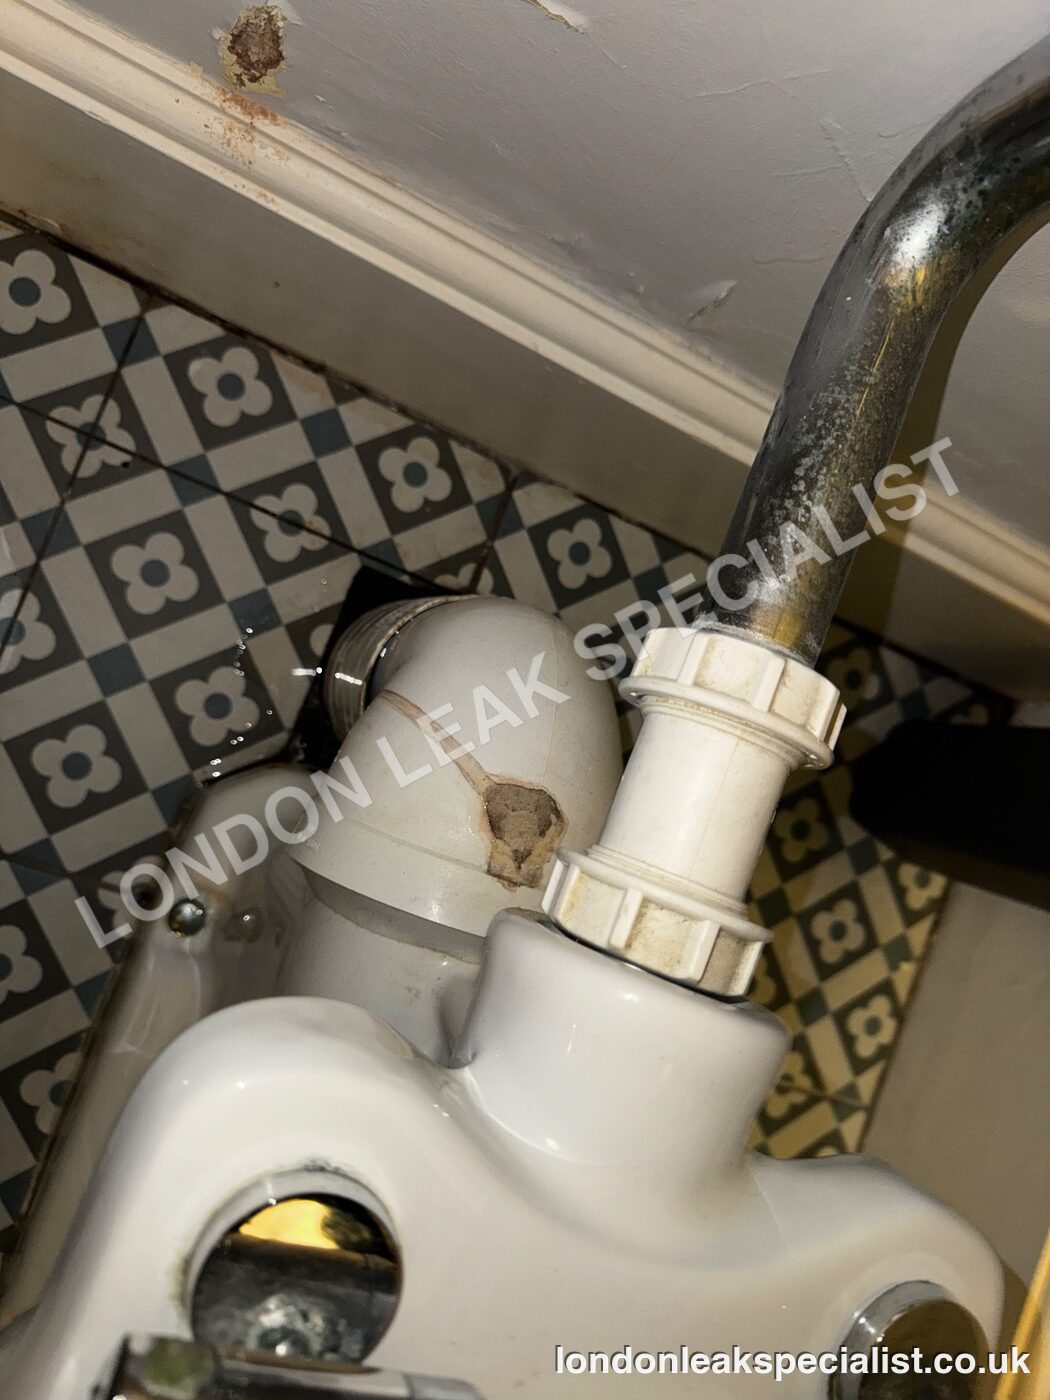
So we flushed the toilet several times and watched the flush connections while it ran. Water dripped from the coupling that joins the flush pipe to the flush cone. When we looked closer, the flush cone itself was leaking as well.
What we found
We dismantled both fittings to see the sealing surfaces. They were worn, with a significant build-up of limescale on and around the seals. Limescale stops a seal seating properly, and a compression joint that does not seat will weep a little every time water goes through it. The volume was small, which is exactly why it took so long to be found. A small amount of water, delivered to the same spot dozens of times a day, is enough to keep a wall damp.
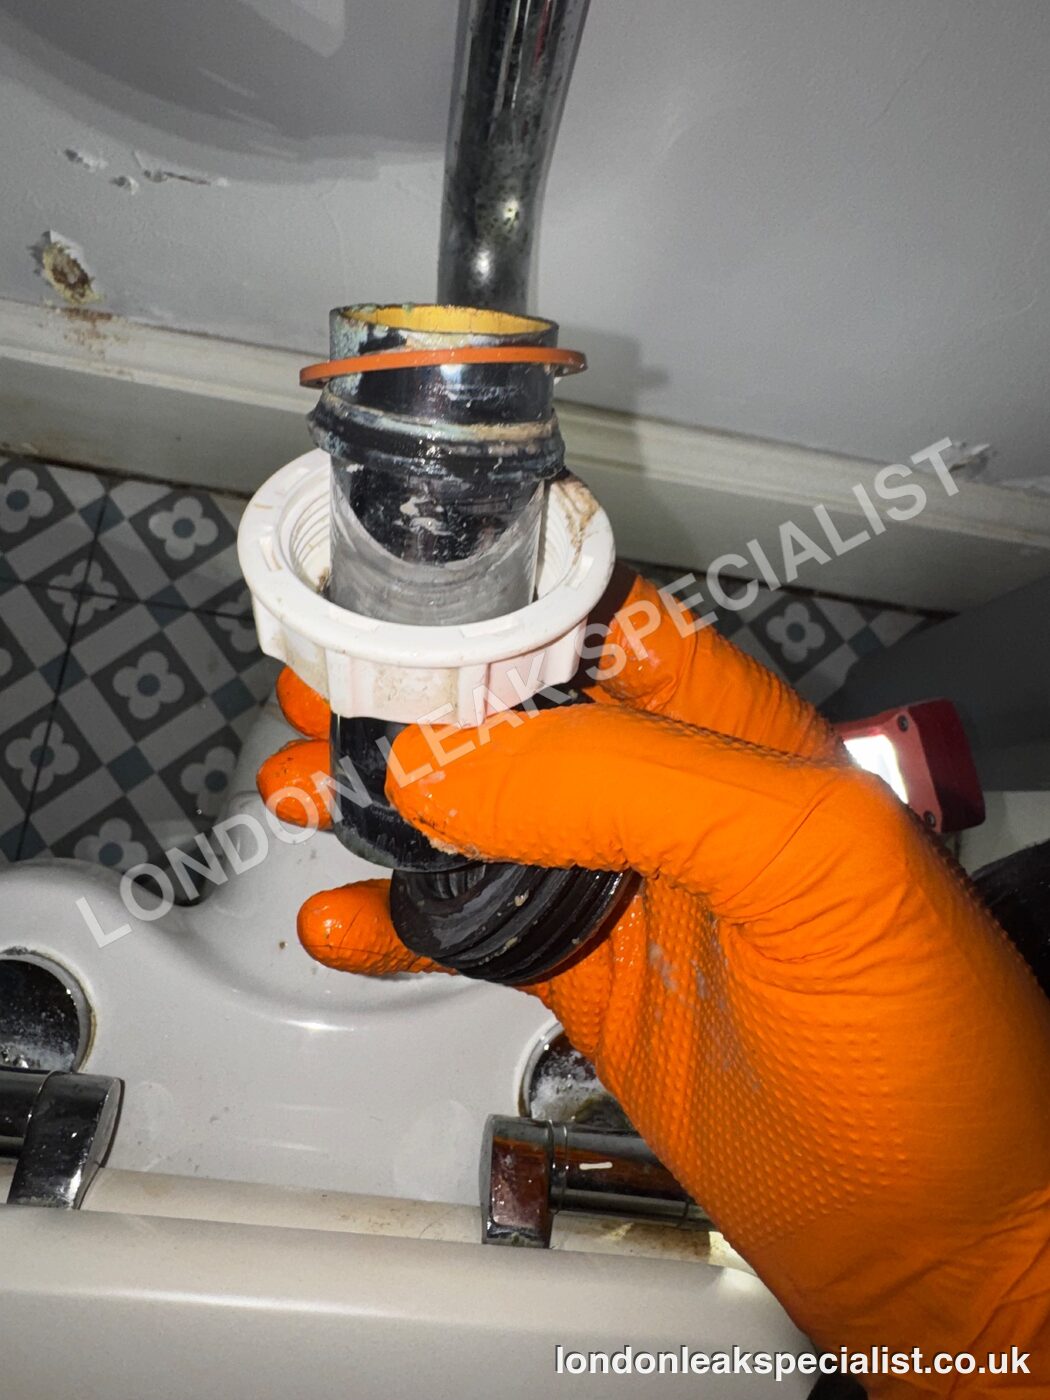
This is a confirmed cause, not a suspected one: we saw water leave the fittings during the flushing test. That distinction is central to the report. Where we had only ruled something out, the report says so. Where we saw the water escape, it says that, and the two are kept apart.
What we did on the day
- Removed the worn flush pipe coupling and flush cone and fitted new ones.
- Flushed the toilet several times and checked the new connections. No leakage was seen.
- Left blue dye in the cistern. If coloured water later appears beneath the toilet or around the pan connector, it would show that something else, such as the pan connector or drainage below the floor, is also leaking.
- Recorded what to monitor and what to do if the damp returns.
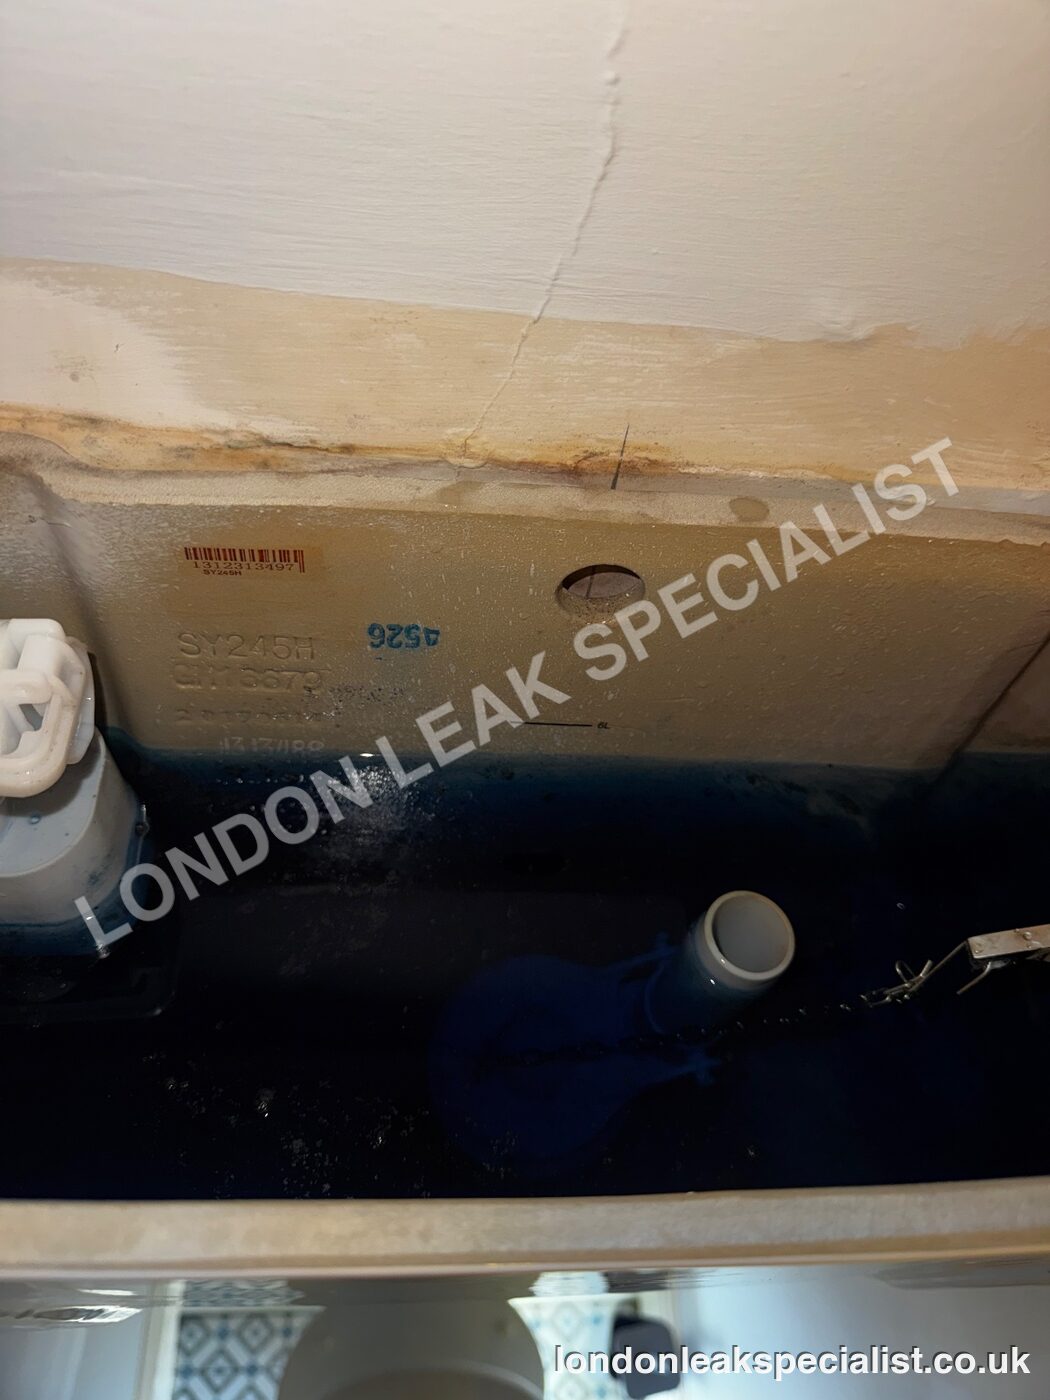
The dye is the part most contractors would not bother with. It costs nothing and it turns a vague instruction to keep an eye on it into something anyone can check: is there blue water where there should not be? We would rather a report left the customer a way to prove the repair worked than just assert it.
What permanent repair and make-good is needed
The leaking fittings are replaced, so the source of the water has been dealt with. What the report cannot say is that the wall is now dry. Walls take weeks or months to dry out on their own, and the report asks for the wall to be monitored. If the damp does not clear, or comes back, the next stage is to open up and inspect the toilet pan connector and the drainage pipe beneath the floor, which we could not see without lifting anything.
Once the wall has stayed dry, the make-good is straightforward: let it dry fully, then treat any staining and redecorate. We can quote that as well, so the owner gets the wall put back to a proper finish and does not have to find another trade to finish the job. If you are weighing up what a visit like this involves, our pricing page sets out the rates.
Why the method saved time and damage
The obvious route here was to assume pipes inside the wall and cut into it. The wall carries pipework for several parts of the house, so that would have meant opening up the wall to look at pipes that were holding pressure perfectly well. A surveyor's note that rules out rising damp can easily be read as pointing at a pipe inside the wall. Here it would have been the wrong reading, and the real leak, at a toilet connection in plain view, would have kept dripping.
The order of testing is what avoided it. Pressure tests cleared the supply. The dye test cleared the basin waste. A flushing test, which costs nothing, found the cause. The cause was found and repaired without opening the wall.
Leaks and damp in Bromley, BR2
Bromley, BR2, and the surrounding London Borough of Bromley are part of the London area where hard water scales up flush fittings and seals, and a small drip behind a toilet can run into a wall for a long time without anyone seeing it. We cover leak detection across the London Borough of Bromley, and the same sequence of tests applies in every postcode district.
The report, and what insurers and agents look for
This leak was a worn fitting, not a burst pipe, so whether insurance responds depends on the policy. Trace and access cover, which pays for finding a hidden leak and the opening-up needed to reach it, is in most but not all buildings policies, and some policies exclude gradual deterioration, which worn seals can fall under. We cannot say what an insurer will decide. What we can do is give them what they need to decide: the reason for the visit, every test and its result including the ones that found nothing, the confirmed cause, photos, what was done and what remains. Our guide to insurance leak claims and the article on trace and access cover go into the detail.
The same report is useful to a landlord or managing agent who needs to show that a damp complaint was investigated properly. It separates what was ruled out from what was confirmed, which stops the argument from restarting every time someone suggests a new theory. You can read it as a redacted PDF.
One more point on water. Thames Water says about one in 20 households has a leaky loo that wastes, on average, 200 to 400 litres a day. That figure is for water slipping past a faulty flush valve inside the cistern, not a drip from an outside coupling like this one, but it shows why a toilet is worth checking when something in the house is wrong. If a leak has already pushed up your bill, see the Thames Water leak allowance.
What you can check yourself
- Flush the toilet and watch the connections. Look at the flush pipe, the coupling and the cone while it runs, with a torch. Many leaks only show during the flush, and no pressure reading will reveal them.
- Dry the area with a paper towel first. Wipe the pipe joints and the pan base, flush, then check the towel. Water shows up on a dry towel far better than on a damp pipe.
- Add a few drops of food colouring to the cistern. If coloured water appears at the base or around the pan, the leak is from the toilet itself and not from the wall. Dye works because it makes a clear liquid visible. See our guides to a leaking toilet cistern and a toilet leaking from the base.
- Do not assume damp means pipes in the wall. Rising damp, condensation and leaks all look alike at first. Our guide to telling damp from a leak shows how to separate them.
- Photograph and date everything. Dated photos of the wall before and after a repair are the evidence you will need if it comes back, or if a landlord or insurer asks.
Damp patches on a wall in Bromley, BR2, or anywhere in London, and no obvious source? We test in an order that avoids opening up more than necessary, repair simple faults on the day, and write the report so that agents and insurers can use it. If we cannot find the leak, you do not pay. We can also quote the repair and make-good afterwards.
How we help with this
If the article describes a problem you actually have, these are the visits that deal with it.
- leak detection in London
Finding a hidden leak without opening the property up first.
- damp and moisture surveys
Moisture mapping that separates a leak from condensation or damp.
Not sure which one applies? Describe the symptom on the phone and you will be told which survey it is, the hourly rate and roughly how long it takes, before anything is booked. 020 7123 8560
Frequently asked questions
Can a leaking toilet cause a damp wall behind it?
Yes. A worn flush pipe coupling or flush cone can drip every time the toilet is flushed, and that water can run into the wall behind. In this Bromley, BR2 job both fittings were leaking, and neither hot nor cold pressure tests showed a fault, because the joint only leaks while the toilet is in use.
Why did the pressure test find no leak?
A pressure test only checks pipes that are full of water under constant pressure. A flush pipe is empty until you flush, so a leak there never shows on a gauge. That is why we test the toilet by flushing it and watching, and why we do not treat a clean pressure test as the end of the investigation.
How do I tell if a damp wall is a leak or rising damp?
A surveyor can look for the signs of rising damp, such as salt deposits, and in this job none were found. A leak is confirmed by seeing water escape, using tests such as pressure testing, dye and operating the fittings. If one is ruled out and the other not found, do not guess: keep testing in order.
How do I know the toilet repair has worked?
Flush several times and check the new connections, then leave dye in the cistern. If coloured water appears beneath the toilet or around the pan connector, something is still leaking. The wall itself can take weeks to dry, so monitor it and photograph it over time.
Do you do leak detection in Bromley and BR2?
Yes. We attend homes in Bromley, BR2 and across the London Borough of Bromley. We find the source or show where it is not, repair simple faults on the day where it is safe to, and can quote the permanent repair and make-good.