Case Study: The Kentish Town Shower Leak Two Pressure Tests Could Not Find
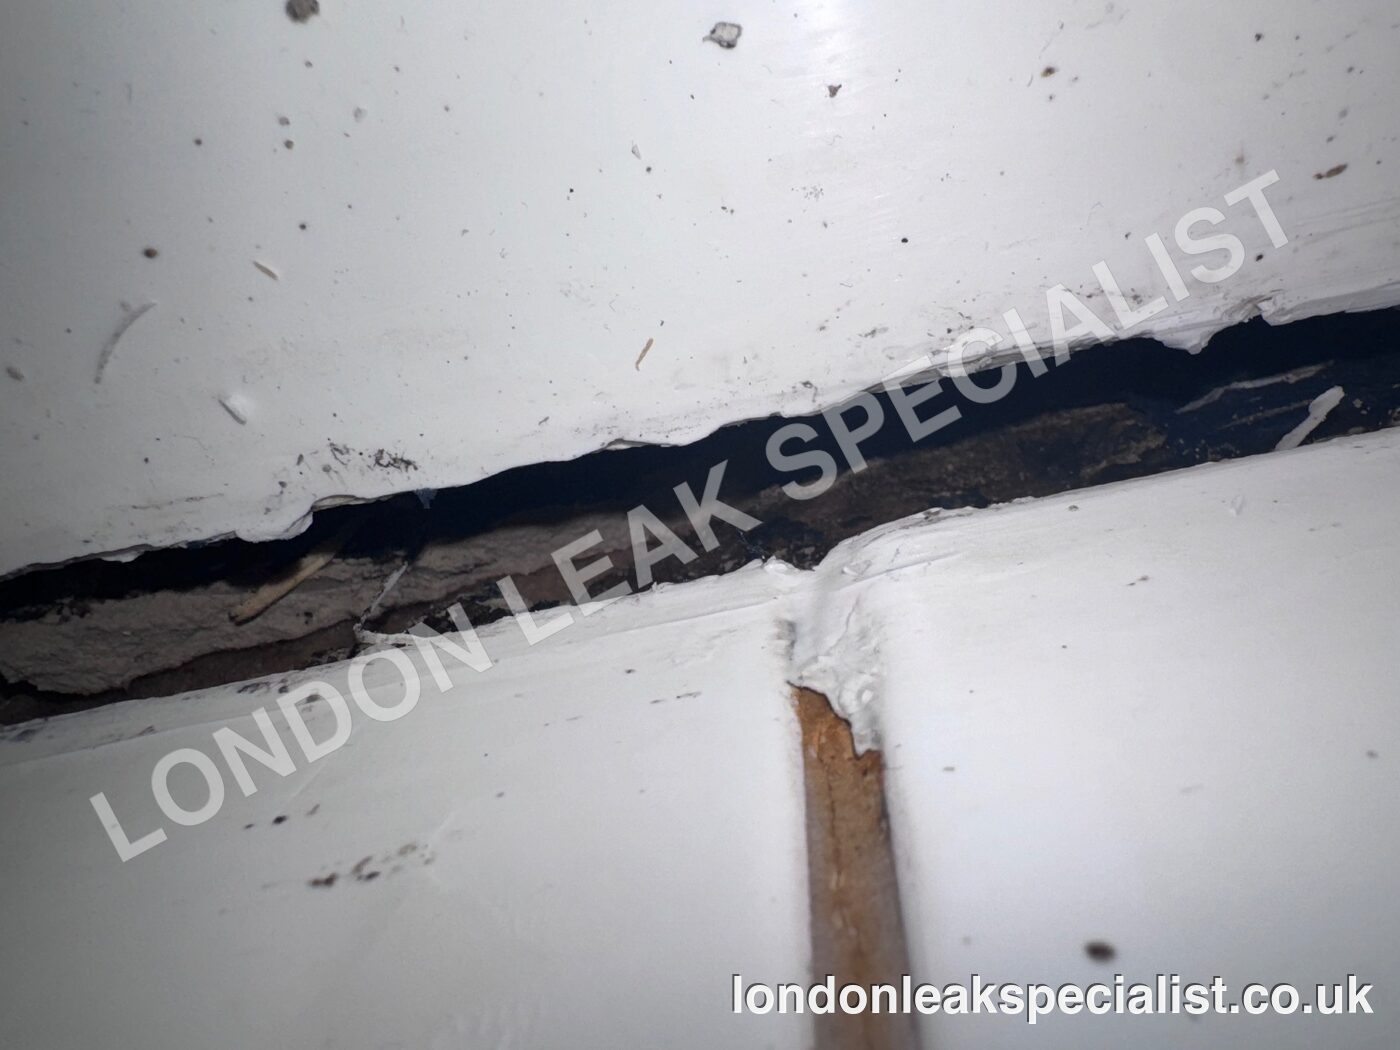
The open joint at the shower tray edge, with the timber beneath it stained, from a job in Kentish Town, NW5.
A Camden Council letter said water was reaching the flat below. Pressure tests pointed at the pipes. The real cause was a shower tray seal, and the report that proved it is the part insurers and managing agents read.
A leak is rarely where the first test says it is. This job, a flat in Kentish Town, NW5, in the London Borough of Camden, is a good example, because the evidence changed twice before it settled, and the second visit only worked because of what the first one had ruled out.
We have removed the client, the address and every contact detail. What is left is the method, the photos and the report, which you can download as a redacted PDF.
The brief: a Camden Council letter and a flat below
The tenant of a flat in Kentish Town, NW5, had received correspondence from Camden Council saying that water might be escaping from the property into the flat below. Nothing was visibly dripping. The owner's managing agent instructed us to carry out a first, non-invasive inspection to establish whether there was a leak and, if so, where.
That kind of instruction is common with London flats, and it is a different problem from a leak in a house. The person who has to prove the cause is rarely the person who lives with it. The report has to convince a council officer, an agent and sometimes an insurer, none of whom can see the pipework themselves.
Visit one: ruling things out
On 15 September we inspected the en-suite shower room first, since that was the most likely route for water: the enclosure, doors, sealing strips, silicone, grout, floor and wall junctions and the accessible pipework. Everything looked intact. We then ran three tests.
- Moisture readings. We recorded slightly raised readings around the shower and into the bedroom and hallway. Moisture meters cannot tell you whether water is arriving now or is left over from before, so this was a clue and not a finding.
- Pressure testing. We isolated the supply and tested hot and cold separately. Both dropped slightly. A fall on both circuits is what a concealed supply pipe leak looks like, and it was the reason we recommended a drain-down and tracer gas test.
- Drainage with tracer dye. We put blue dye through the shower, toilet, basin and the main bathroom, and watched for any escape. None appeared.
The honest conclusion of that visit was that the source was not confirmed. We said so in the report, with the evidence pointing at the water supply to the shower, and recommended the next stage. A report that states what it could not prove is more useful to a managing agent than one that guesses, and it is the version an insurer's loss adjuster is more likely to trust.
Visit two: tracer gas, and a second look at the pressure test
On 28 September we returned with tracer gas equipment and repeated the pressure test on a cleaner footing.
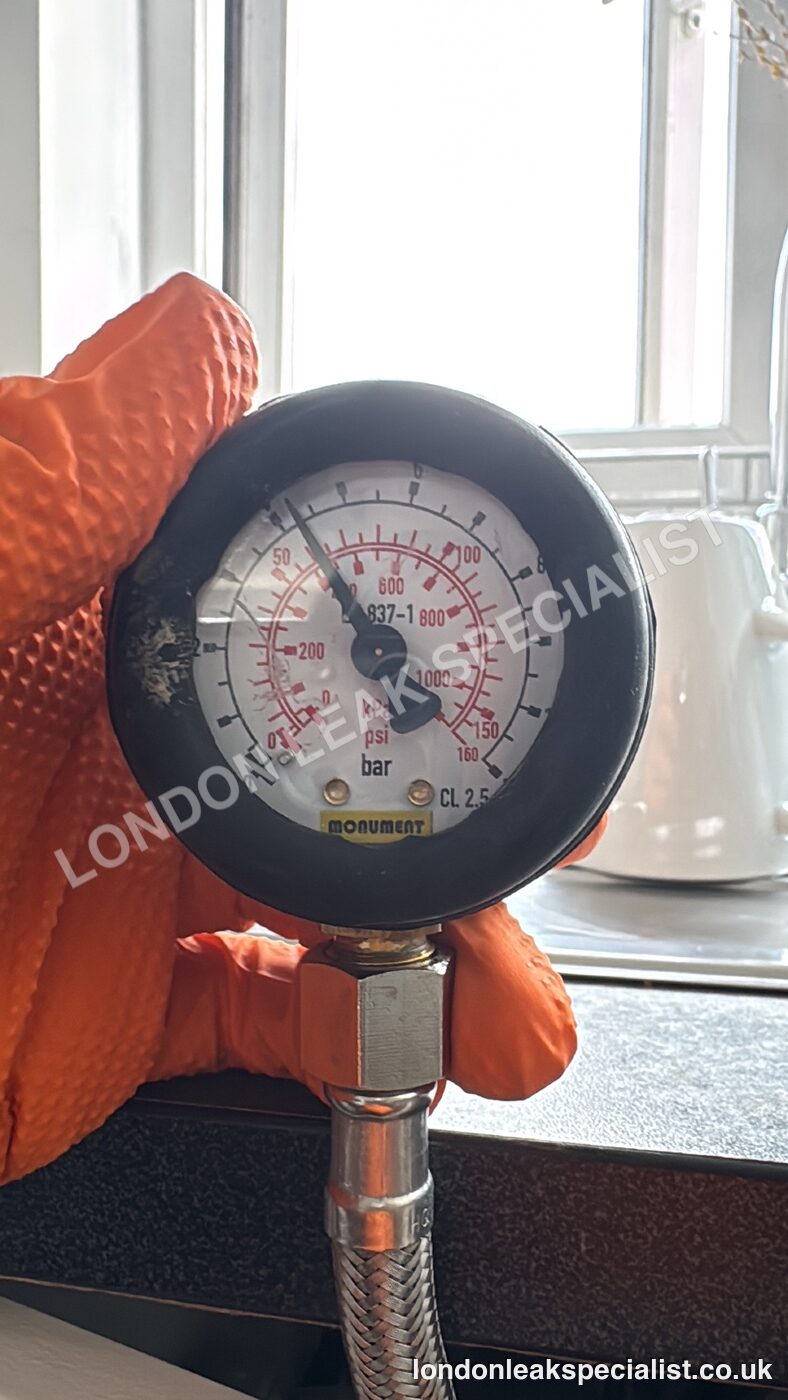
Cold water showed a more noticeable drop than hot. That looked like the leak. It was not. The cold loss was later traced to a valve on a toilet cistern, which is a nuisance and not a damage source. This is the trap with pressure testing: a drop tells you that water is going somewhere, not that it is going somewhere harmful. It is the reason we do not treat one test as a diagnosis.
We then put tracer gas into both the hot and cold pipework. A trace of gas appeared at the isolation valves on both systems, which meant the valves were passing a little. There was no gas anywhere that could account for the amount of damage in the flat. By this point the supply pipework had been tested three different ways and was not the main cause.
Opening up in the right place
Everything now pointed at the shower area, so we created a small access behind the skirting and beneath the shower tray. The result was immediate: a strong smell of damp, saturated timber and wet, water-damaged plasterboard.
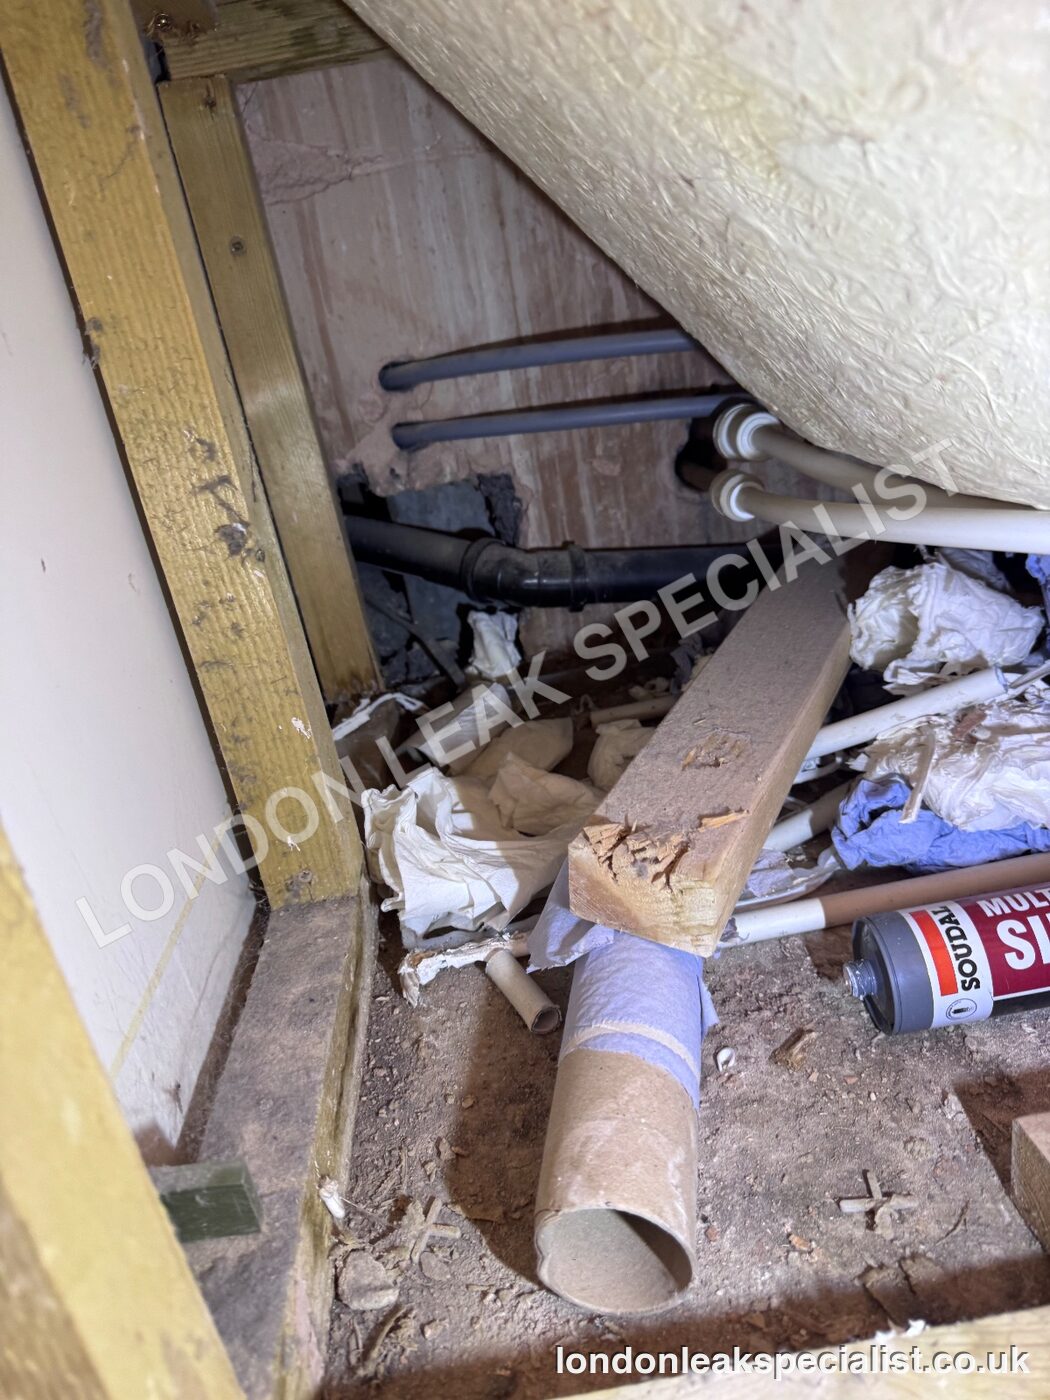
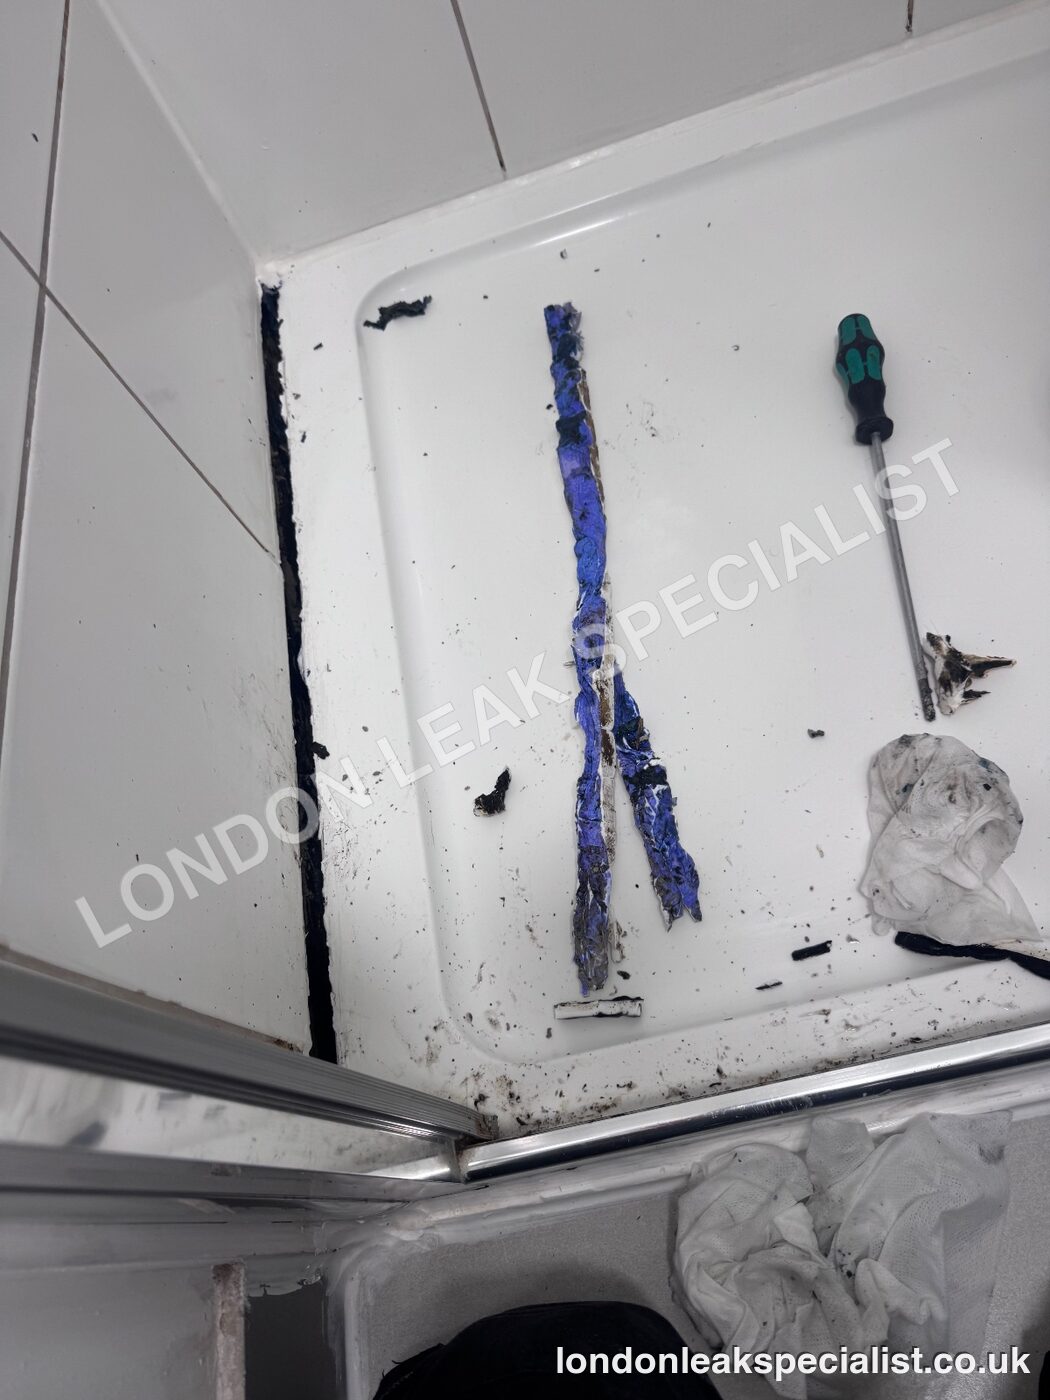
This is the detail that made the report conclusive. The blue dye we had used on 15 September had travelled into the concealed structure under the tray. Water from the shower area had gone exactly where we then found the damage. We did not need to argue that it was the likely route, because we had a dated marker showing it.
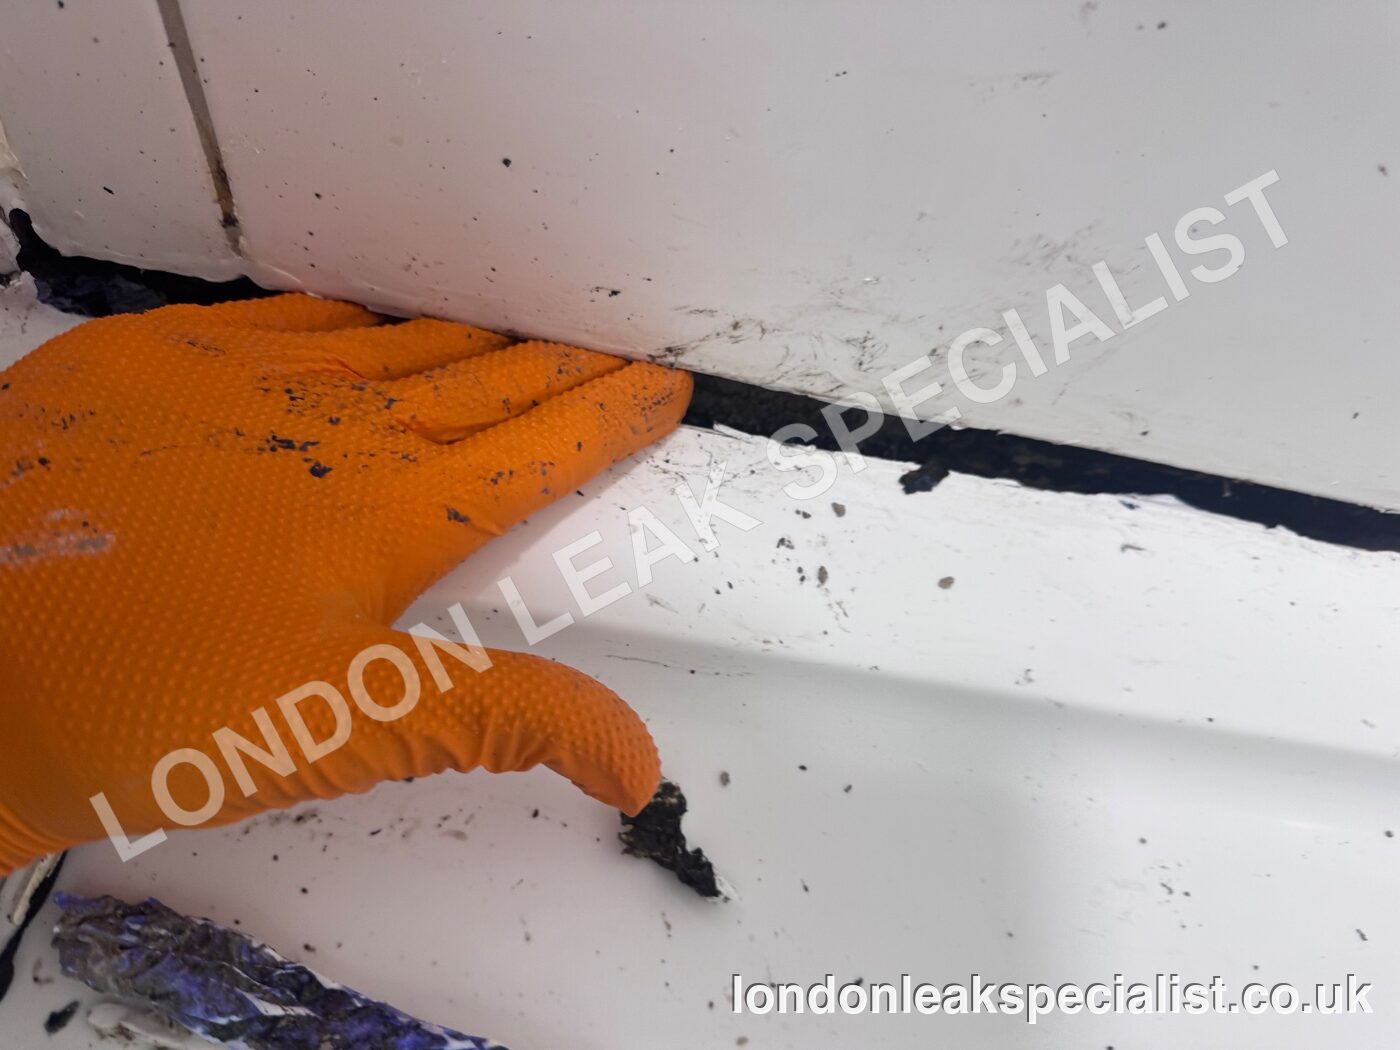
A controlled shower test finished the job. With the shower running, water was seen entering around the tray and through the surrounding mastic. We also tested the tray trap and waste separately, and they did not leak. The cause was the shower tray and enclosure sealing, not a pipe.
What we did on the day
- Cut out the failed mastic and fitted a new seal around the tray, as a temporary measure to reduce further water entering the structure.
- Tested the tray trap and waste after the work, with no leak found.
- Advised that the new mastic should be left untouched for 24 to 48 hours to cure before normal use.
- Recorded the permanent works needed, and flagged that the saturated timber and plasterboard would need drying out and possibly replacing even after the source was stopped.
The permanent scope is in the report: remove the enclosure as required, strip the affected tiles, inspect and replace damaged substrate, refit a suitable sealing system, retile, regrout with waterproof grout, apply continuous sanitary-grade mastic, and carry out a full shower test at the end. We can quote that work separately, so the customer does not have to find a second contractor to finish it.
Why the method mattered
If the first pressure drop had been taken at face value, the next step would have been to open floors and walls along the supply pipework. That is the expensive, disruptive route, and in this flat it would have been the wrong one, because the pipes were not what was damaging the property. Ruling the supply out with three separate tests meant the one place we opened up was the right place.
That is the practical difference between a leak specialist and a general plumbing visit. A plumber is paid to fix the thing in front of them. A leak investigation is paid to establish which thing is the cause, in an order that avoids unnecessary damage, and to leave a record that someone else can rely on.
Leaks in Kentish Town, NW5 and across Camden
Kentish Town is mostly Victorian terraces that have been split into flats, with suspended timber floors and bathrooms added on upper storeys, and the ground slopes down toward the valley. A leak in one flat tends to surface in the one below, which is how a Camden Council letter like this one arises. We cover leak detection in Kentish Town and the rest of Camden, including Camden Town, Hampstead, Belsize Park and Holborn, and the same sequence of tests applies in every postcode district.
The report, and what insurers look for
Insurers are paying escape of water claims at a rate of around £1.8 million a day, according to figures attributed to the ABI, and they scrutinise the evidence behind each one. A report that is likely to stand up has the same features this one has:
- The reason for attendance and the date, so the timeline is clear.
- Every test named, with its result, including the ones that found nothing.
- A confirmed cause, separated from suspected causes.
- Dated photographs of the cause, not only of the damage.
- What was done on the day and what is still outstanding.
Trace and access cover, which pays for locating a hidden leak and the opening-up needed to reach it, is included in many buildings policies but not all of them. Whether the repair itself is covered depends on the cause. Some policies exclude gradual deterioration, and worn sealant can fall into that category, so a failed shower seal is a case where reading the wording matters. We cannot tell you what your insurer will decide, but we can make sure the evidence is complete when you ask. Our guide to insurance leak claims and the article on trace and access cover go through the wording in more detail.
You can read the full report as a redacted PDF.
What you can check yourself
Most of what we did needs equipment, but the thinking transfers. If you are chasing a leak into a lower flat, these checks are worth doing before anyone arrives:
- Look at the shower seal first. Press along the mastic where the tray meets the wall and tiles. If it lifts, cracks, is blackened or has gaps, treat it as a suspect. It is the most common route in a flat, and it costs very little to inspect.
- Run the shower on its own, then the other fixtures. Check the ceiling below each time. A stain that only appears after the shower runs points to the shower area, not the pipes.
- Do the meter test. Turn everything off, read the meter, wait half an hour and read it again. If it has moved, you have a live supply leak. If it has not, a pressure drop is more likely to be a valve or a fitting. Our guide to why a water meter spins explains the readings, and if a leak has already inflated your bill, see the Thames Water leak allowance.
- Photograph and date everything. Stains, readings, the date you first noticed it and any letters received. This is the evidence trail an insurer or a council officer asks for.
- Do not rely on one test. A pressure drop, a damp reading and a stain each tell you something different. The cause is where they agree.
Water reaching a flat below in NW5, Camden or anywhere in London, or a pressure drop you cannot explain? We investigate in a sequence that avoids opening up more than necessary, and we write the report so that insurers, agents and councils can use it. If we cannot find the leak, you do not pay. We can also quote the repair and make-good afterwards.
How we help with this
If the article describes a problem you actually have, these are the visits that deal with it.
- leak detection in London
Finding a hidden leak without opening the property up first.
- acoustic leak detection
Ground microphones and correlators on a pressurised pipe.
- central heating leak detection
For a boiler losing pressure or a circuit that will not hold.
Not sure which one applies? Describe the symptom on the phone and you will be told which survey it is, the hourly rate and roughly how long it takes, before anything is booked. 020 7123 8560
Frequently asked questions
Who do I contact if Camden Council says water is leaking into the flat below?
Start by finding the source, because the council letter is about the effect and not the cause. We attend flats in Kentish Town, NW5 and across Camden, test the supply, drainage and shower area in sequence, and write a report you can give to the council, your landlord or managing agent and your insurer. The council will want to see that the cause has been found and dealt with.
Can a shower tray leak cause damp in the flat below?
Yes. If the sealant around the tray or enclosure fails, water can run into the floor structure beneath and travel down into the ceiling of the flat below. Because nothing drips visibly, it can go on for a long time, as in this case, where the timber and plasterboard beneath the tray were saturated.
Why would a pressure test show a drop when there is no leak from the pipes?
A pressure drop shows that water is moving somewhere, not that it is escaping into the building. In this job the cold side fell further than the hot, and the loss was later attributed to a valve on a toilet cistern. That is why we confirm the result with a second method such as tracer gas before opening any floor or wall.
How do you find a leak without ripping the property apart?
We rule causes out in order, starting with visual inspection, moisture readings, pressure testing and drainage dye tests, then tracer gas on the supply pipework. We only open up once the evidence points to one location, and then we make a small access, as we did beneath the shower tray here.
Will my insurer pay for leak detection?
Many buildings policies include trace and access cover, which pays for finding a hidden leak and the opening-up needed to reach it, but not every policy does, and some exclude gradual deterioration such as worn sealant. Check the wording, keep a detailed report and photographs, and ask your insurer before you commission work if you can.
Do you fix the leak as well as find it?
Yes. We carry out temporary repairs on the day where it is safe to, such as resealing a failed shower tray, and we can quote the permanent repair and make-good afterwards, so the property is put back as it was.