Shower Leaking Through the Ceiling: Causes, Costs and Fixes
A stain or drip on the ceiling below the bathroom almost always traces back to one of five shower failure points. Here is how to find which one, what each fix costs in the UK, and where insurance actually helps.
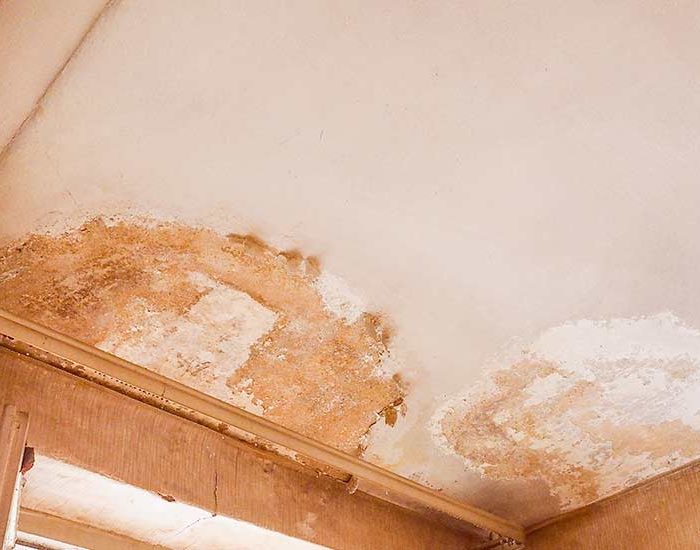
A brown stain, a sagging patch or an actual drip appearing on the ceiling below your bathroom is one of the most common leak call-outs in London — and one of the most misdiagnosed. Nine times out of ten the shower is to blame, but "the shower" covers at least five separate failure points, each needing a different fix at a very different price. Reseal a tray for under £150 and you may solve it in an afternoon; misread the symptoms and you can spend £600 retiling a wall that was never the problem.
This guide covers the usual suspects in the order they actually occur, a diagnostic sequence you can run yourself in under an hour, realistic UK repair costs, and the two questions that cause the most stress: does insurance pay, and what happens when the damaged ceiling belongs to the flat below.
Why shower leaks show up on the ceiling below
A shower produces a lot of water in a small area — a typical mixer shower puts out 8 to 12 litres a minute, so a ten-minute shower throws around 100 litres at your tray, tiles and waste. Any weakness in the waterproofing lets a small fraction of that escape into the floor void, where it soaks joists and plasterboard until it finds the lowest point and appears as a stain or drip on the ceiling below.
Two things make these leaks deceptive. First, they are intermittent: the leak only runs while the shower runs, so the ceiling can dry out between uses and the stain grows in fits and starts. Second, water travels. It follows joists, pipe runs and the slope of the plasterboard, so the drip point downstairs can be a metre or more from the actual defect upstairs. That is why "cut a hole where the drip is" sometimes opens a perfectly dry section of ceiling — and why professional leak detection uses moisture mapping and thermal imaging to trace the water to its true source before anyone cuts anything.
If your stain appears or worsens when nobody has showered, the shower may not be the culprit at all — a heating pipe or supply pipe in the floor void behaves differently, and our guide to a damp patch on the ceiling covers the wider possibilities.
The five usual suspects, in order of likelihood
1. Failed silicone sealant or grout
The most common cause by a distance. Silicone sealant around the tray and in the enclosure corners has a working life of roughly five to ten years; it loses adhesion, goes mouldy, or develops hairline gaps where the tray meets the tiles. Cracked or porous grout does the same job of letting water behind the tiles, where it runs down the wall cavity and into the floor. The tell-tale sign is a leak that only appears when the shower spray hits a particular wall or corner, and often only during longer showers.
2. Shower tray movement
A tray that was not fully supported when installed — bedded on legs without a solid base, or sitting on an uneven floor — flexes slightly every time someone stands in it. That constant movement breaks the silicone seal no matter how many times it is renewed. If you can feel the tray dip or hear it creak when you step in, resealing alone is a temporary fix at best; the tray needs to come out and be re-bedded on a solid bed of mortar or a proper tray kit. A related failure is a hairline crack in an older acrylic tray, which leaks directly through the base.
3. The waste trap and its joints
Under the tray sits the waste: a rubber-sealed drain fitting through the tray itself, a trap, and push-fit or solvent-weld joints connecting it to the 40mm waste pipe. Any of these can weep — the rubber seal under the tray flange perishes, the trap works loose, or a push-fit joint was never quite seated. Waste leaks have a distinctive signature: the ceiling gets wet even if you carefully pour water only down the plughole, without splashing the walls or tray edge at all. Because the waste sits in the sealed void beneath the tray, access is the whole problem — more on that below.
4. The concealed shower valve
Concealed mixer valves buried in the wall look sleek but hide their failures. O-rings and cartridge seals inside the valve, or the connections behind the plate, can weep continuously or only when the shower runs. A clue that points to the valve: dampness concentrated on the wall directly behind or below the valve position, or a leak that appears within seconds of turning the shower on — before any water has had time to pool in the tray.
5. The supply pipework
Least common, but most serious: the hot and cold pipes feeding the shower. A weeping compression fitting or a pinholed pipe leaks whether or not anyone showers, because the pipework is under mains or pump pressure 24 hours a day. If the ceiling stain grows steadily day and night, treat it as a live pressurised leak — isolate the water (our guide to finding your stop tap shows you how) and call an emergency plumber rather than waiting for a routine appointment.
The diagnostic sequence you can run yourself
You can usually narrow the cause to one or two suspects in under an hour, without lifting a tile. Work through these steps in order, and change only one variable at a time:
- Let everything dry. Stop using the shower for 24–48 hours. If the ceiling keeps getting worse, the leak is pressurised pipework or heating, not the shower — skip to step 6.
- Test the waste in isolation. With the tray dry, pour a full bucket of water slowly and directly down the plughole, keeping the tray edges and walls dry. Watch the ceiling below (or the stain) for 15–30 minutes. Wetness now points squarely at the waste trap or its joints.
- Dye test the tray. Put the plug in or cover the waste, add a few centimetres of water with a generous dose of food colouring, and leave it for an hour. Coloured water appearing below means a cracked tray or a failed seal at the tray-waste junction.
- Test the walls. Run the shower head deliberately against each wall and corner of the enclosure for a few minutes at a time, keeping water away from the plughole as much as possible. A leak that appears only when a particular joint gets wet is failed sealant or grout at that joint.
- Test the door or screen. Splash water at the screen seals and the channel where the door meets the tray — leaking enclosure seals are a frequent and cheap-to-fix culprit that gets blamed on everything else.
- Check for a constant leak. If the ceiling deteriorates with the shower unused, check your water meter with everything off — a moving meter confirms a pressurised leak. Our article on a spinning water meter explains the reading to do.
Take photos at every stage. If this ends in an insurance claim, dated photos of the tests and the damage strengthen it considerably.
What repairs cost in the UK
These are typical 2026 ranges drawn from UK trade cost guides and London fixed-price services. London jobs tend to sit at the top of each range.
| Repair | Typical UK cost | Time on site |
|---|---|---|
| Strip and reseal tray/enclosure silicone | £80–£150 | 1–2 hours (silicone then needs 24h to cure) |
| Regrout shower area | £100–£250 | Half a day |
| Replace waste trap via ceiling below (incl. cutting access) | £150–£350 plus ceiling repair | Half a day |
| Remove, re-bed and refit shower tray | £300–£600 (more if tiles or tray are replaced) | 1–2 days |
| Replace concealed shower valve | £250–£500 plus the valve; more if tiles must come off | Half to full day |
| Repair supply pipe in floor void | £150–£400 depending on access | 2 hours to half a day |
| Patch and repaint plasterboard ceiling below | £150–£400 for a typical patch (£30–£40 per m² plus decorating) | Two visits (patch, then mist and paint) |
Two honest caveats. First, resealing only lasts if the underlying surfaces are sound and the tray does not move — paying £120 to reseal a rocking tray buys you a few months, not a fix. Second, the ceiling repair is a separate cost from the leak repair, and it cannot sensibly be done until the void above has fully dried, which can take one to three weeks after the leak stops.
Tiles off or ceiling down? Choosing the access route
For waste, valve and pipe repairs, someone has to reach the sealed space under the tray or inside the wall. There are only three ways in, and choosing the right one is where experience saves money:
- Through the ceiling below. Usually the cheapest and least destructive route to a leaking waste trap. A neat plasterboard cut-out under the trap allows the trap and joints to be remade, and the ceiling is patched afterwards — often the damaged plasterboard needed replacing anyway. This is the default when the room below is yours and the ceiling is standard plasterboard.
- By removing the tray. Necessary when the tray itself is cracked, poorly bedded or moving. Expect some tile damage along the bottom row; a careful fitter can often save them, but budget for a few replacements.
- Through the tiles. The last resort, reserved for concealed valves and in-wall pipework with no rear access. Matching discontinued tiles is the hidden cost here, which is why insurers and good contractors document everything with a proper trace and access report before opening walls.
The wrong call is expensive in both directions: cutting a lath-and-plaster ceiling in a period conversion to reach a waste that could have been fixed by lifting the tray, or stripping a tiled wall chasing a leak that was actually the door seal. Pinpointing the source first is exactly what non-invasive detection is for.
Will insurance pay?
The rule of thumb for UK home insurance: the resulting damage from an escape of water is usually covered; the faulty part itself is not. In practice that means:
- Usually covered: the ruined ceiling, damaged decorations, warped flooring and — where your policy includes trace and access cover — the reasonable cost of finding the leak and making good the holes cut to reach it.
- Usually not covered: the new silicone, the replacement trap, the re-bedded tray or the new valve. These are treated as maintenance, and failed sealant in particular is routinely classed as wear and tear or gradual deterioration.
Insurers also scrutinise how long the leak ran. A slow seep that visibly stained a ceiling for months before anyone acted can be declined as gradual damage, so report it and act promptly. Most policies carry an escape-of-water excess of £250–£500, which makes small claims uneconomic — but a soaked ceiling, ruined flooring and full redecoration can easily justify claiming. A professional, insurer-ready report stating the cause, the trace method and the access work strengthens the claim; we cover the mechanics in our guide to trace and access insurance cover.
When the ceiling belongs to the flat below
In a London flat, a leaking shower usually announces itself via an unhappy downstairs neighbour, and the liability picture is genuinely more complicated:
- You are not automatically liable for their damage. Under English law, liability generally requires negligence — knowing about a problem and failing to act. A leak you could not reasonably have known about is bad luck, not negligence; ignoring a known drip for weeks is another matter.
- In most purpose-built blocks and conversions, the buildings insurance is a block policy covering the whole building. Damage to the flat below is typically claimed on that policy, and who pays the excess depends on the lease — some leases push it to the flat where the water escaped, others spread it across the service charge.
- The repair to your shower remains your cost as the leaseholder, because fittings inside your flat are almost always your responsibility to maintain.
- Act fast and keep records. Written notice of the leak starts the clock on your duty to act; from that point, delay is what creates negligence claims. Getting a detection visit booked and documented quickly protects you as much as it protects your neighbour.
What homeowners report on Reddit and forums
Threads on r/DIYUK, MoneySavingExpert and the trade forums show remarkably consistent patterns. The most common story is the reseal that did not work: a homeowner pays for new silicone, the ceiling stain returns within weeks, and only then does someone test the waste and find the real leak was under the tray all along — which is why the pour-a-bucket-down-the-plughole test comes up again and again as the single most useful diagnostic. A second recurring theme is surprise at how far water travels: posters describe cutting the ceiling at the drip point, finding the void bone dry, and locating the actual wet patch a metre away along the waste run. Flat owners repeatedly describe confusion over block insurance excesses, with managing agents asking the leak-source flat to pay £500 or more and leaseholders discovering the answer genuinely depended on their lease wording. And plumbers on trade forums are consistent on one point: for tray and waste leaks in a house, going in through the ceiling below is often the cleanest route, precisely because the plasterboard was water-damaged anyway.
When to bring in professional leak detection
If the home tests give you a clear answer — coloured water below after a dye test, or a wet ceiling after wetting one corner — you can go straight to a plumber with a specific, quotable job. Bring in detection specialists when the tests are ambiguous, when the ceiling below belongs to someone else and the cause needs documenting, when the stain grows without the shower being used, or before anyone removes tiles on a guess. We survey with thermal imaging, moisture mapping and acoustic equipment, agree a fixed detection fee at booking (typically £250–£450, on a genuine no-find, no-fee basis — see our pricing), quote any repair before work starts, and issue insurer-ready reports within 48 hours across all 33 London boroughs.
If water is coming through your ceiling right now, isolate the shower or the stop tap, protect the room below, and get in touch — tell us what you have already tested and we will tell you honestly whether you need a detection survey or just a plumber with a tube of silicone.
Frequently asked questions
Why does my ceiling only leak when someone showers?
A leak that appears only during or shortly after showers points to the shower's waterproofing rather than pressurised pipework: failed silicone or grout, a moving or cracked tray, leaking enclosure seals, or a weeping waste trap. Water escapes only while the shower is running, soaks into the floor void, and drips through once enough has collected. A stain that grows day and night regardless of shower use suggests a supply or heating pipe instead, which needs isolating quickly.
How do I find out exactly where my shower is leaking?
Test one component at a time with everything dry. Pour a bucket of water directly down the plughole — a wet ceiling means the waste trap or its joints. Then plug the waste and fill the tray with a few centimetres of dyed water for an hour — colour below means a cracked tray or tray-waste seal. Finally spray each wall and the screen seals in turn. Whichever single test reproduces the leak identifies the failure point.
How much does it cost to fix a shower leaking through the ceiling?
It depends entirely on the cause. Stripping and resealing the silicone typically costs £80–£150; replacing a waste trap through the ceiling below runs £150–£350 plus ceiling patching; re-bedding a moving tray costs around £300–£600; and a concealed valve replacement is £250–£500 plus parts. Patching and repainting the damaged ceiling adds roughly £150–£400. London prices generally sit at the top of these ranges.
Is a shower leak through the ceiling covered by home insurance?
Usually in part. The resulting damage — ruined ceiling, decorations and flooring — is normally covered under escape of water, and trace and access cover pays for finding the leak and making good the openings. The faulty component itself (sealant, trap, tray or valve) is treated as maintenance and is not covered. Insurers can also decline claims where a leak was visibly left for months, so report damage and act promptly.
Do I have to pay for damage if my shower leaks into the flat below?
Not automatically. Under English law you are generally only liable for the neighbour's damage if you were negligent — for example, you knew about the leak and did nothing. In most blocks the damage below is claimed on the building's block insurance policy, and the lease determines who pays the excess. You do remain responsible for repairing your own shower, and acting quickly once notified is the best protection against a negligence claim.
Should the leak be fixed through the ceiling below or by removing tiles?
It depends on the failed component. A leaking waste trap is usually reached most cheaply through a plasterboard cut-out in the ceiling below, which is often water-damaged and due for replacement anyway. A cracked or badly bedded tray must come out from above. Tiles only need to come off for concealed valves or in-wall pipes with no other access. Confirming the source before cutting anything is what prevents expensive wrong guesses.